Summary: The optimal temperature for FDM printers depends on numerous considerations
Introduction
When I embarked on my 3D printing journey, I questioned, “What is the optimal temperature?” Responses varied from 180°C to 280°C, leading me to examine calibration cubes in detail.
Sensors
In case you are unsure about your sensor type, you’re most likely using a generic Chinese 100 kΩ resistance sensor, or thermistor. Its beta value indicates the decline in resistance as temperature decreases.
Note #1: Typically, this value is defined for a temperature range of 0 °C to 80 °C. However, at 200 °C, you may experience a 10 °C offset.
Note #2: The accuracy of your sensor may be questionable due to its low cost. The presence of heat resistance in your heat block may introduce additional inaccuracies. Furthermore, the inbuilt ADC and the reference of the most affordable counterfeit Atmega clone your supplier could find are used for measurements.
Note #3: The required temperature can vary based on the speed. With poor heat conduction properties, PLA may require a slight temperature increase to liquefy the filament core.
The Calibration Cubes
I printed these at 150 mm/s using Cura, with an acceleration of 3500 mm/s² on my inexpensive delta printer. The nozzle size was 0.4 mm and the layer height was 0.1 mm.
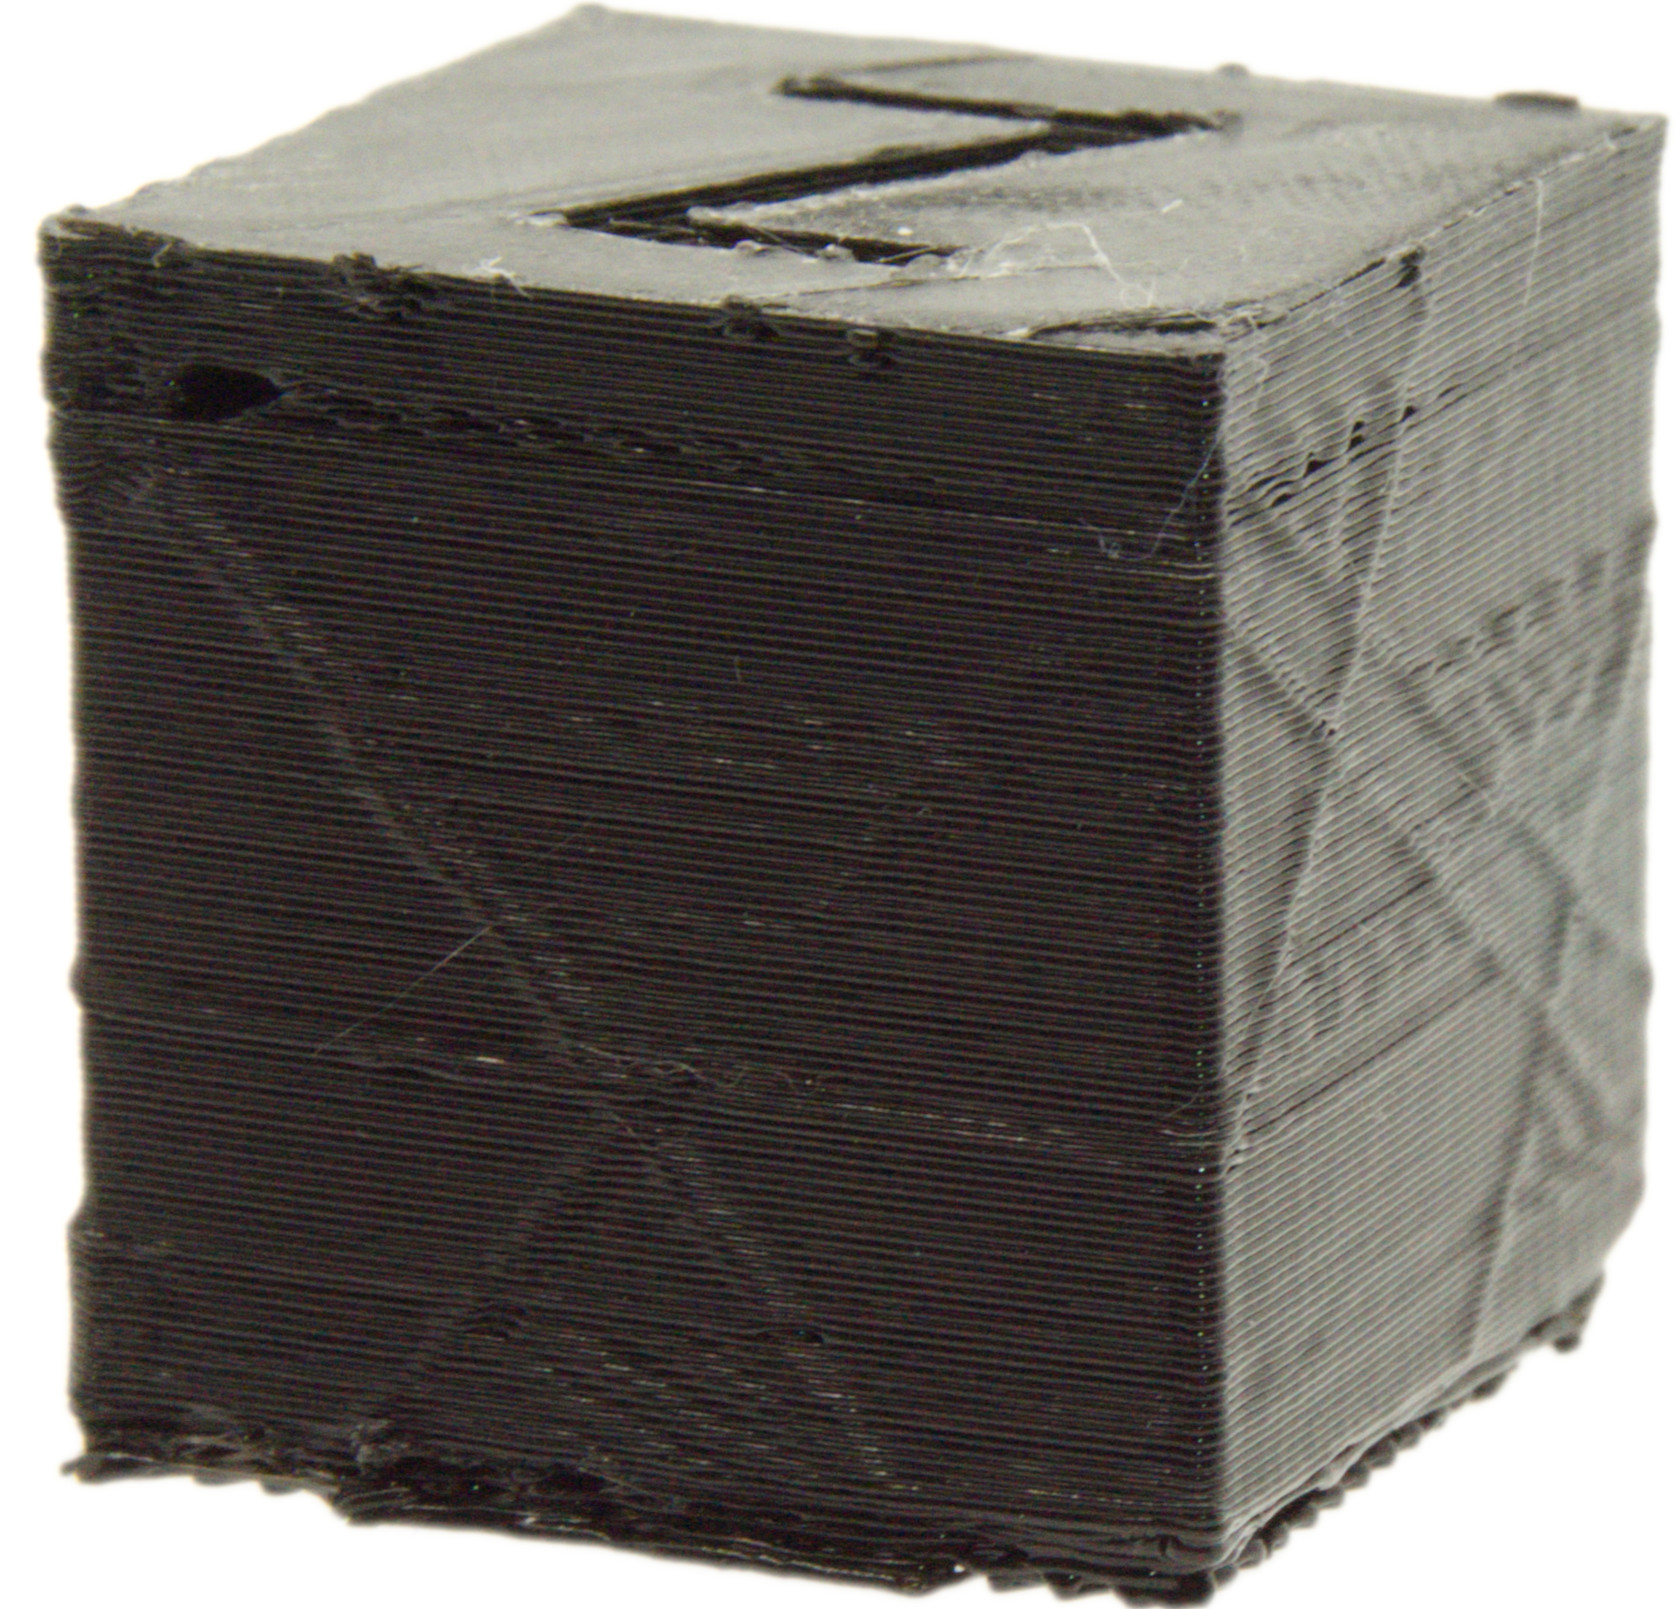
Too Hot
Printed at 290°C.
The fuzzy surface is a result of moisture in the filament, causing gas bubbles to expand and form a microscopic styrofoam-like texture. The bottom layers appear fine as the filament had ample time to dry in the initial few centimeters of the bowden tube.
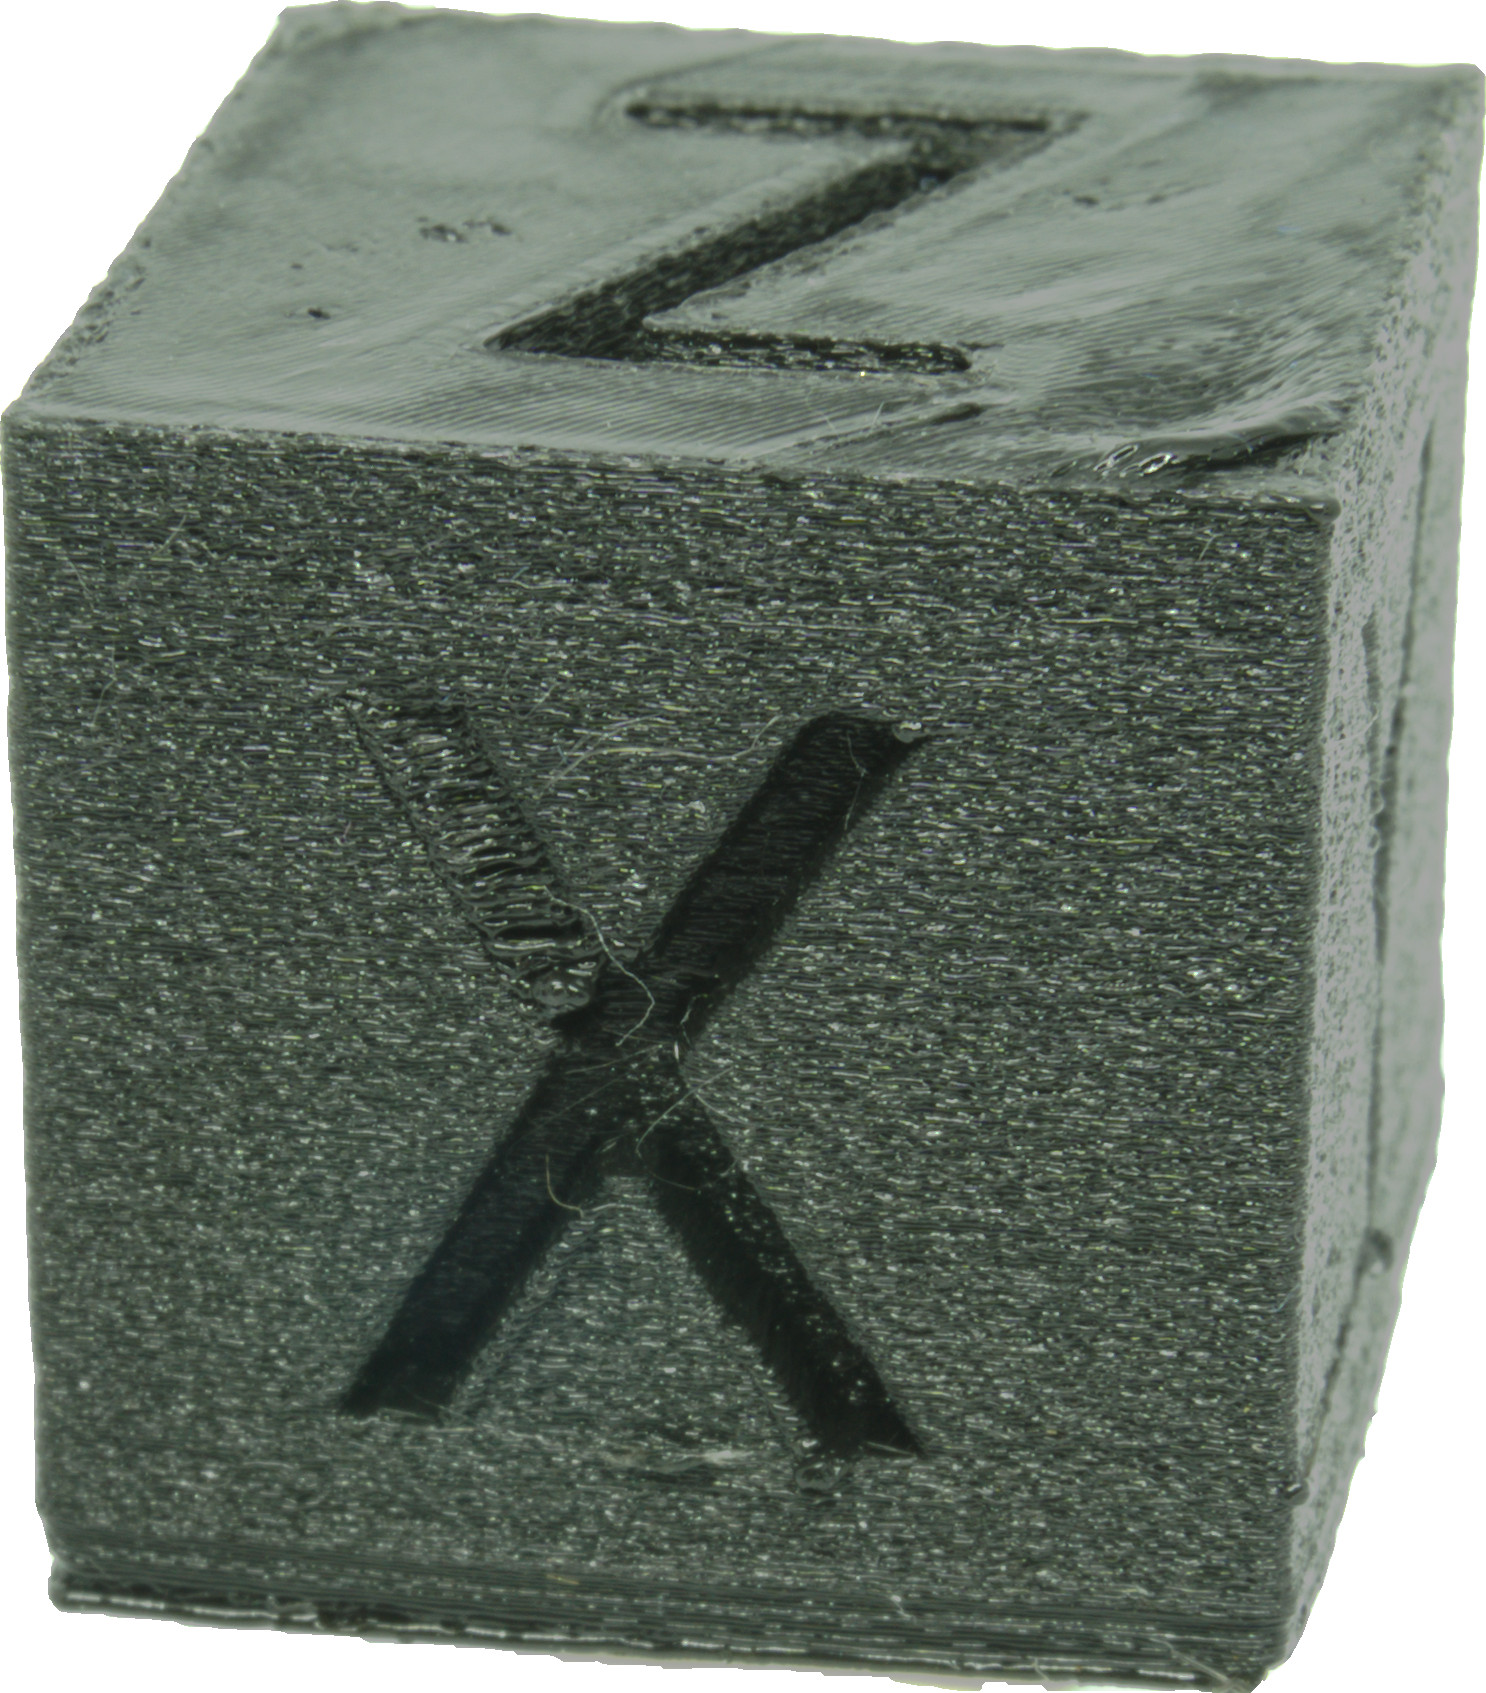
Too Cold
Printed at 190 °C. The extruder halts and makes clicking noises at 180°C.
This print displays the brink of underextrusion. There is some stringing in the upper left part of the X due to the extruder pushing at the end of the path while the plastic isn’t fully squeezed through the nozzle.
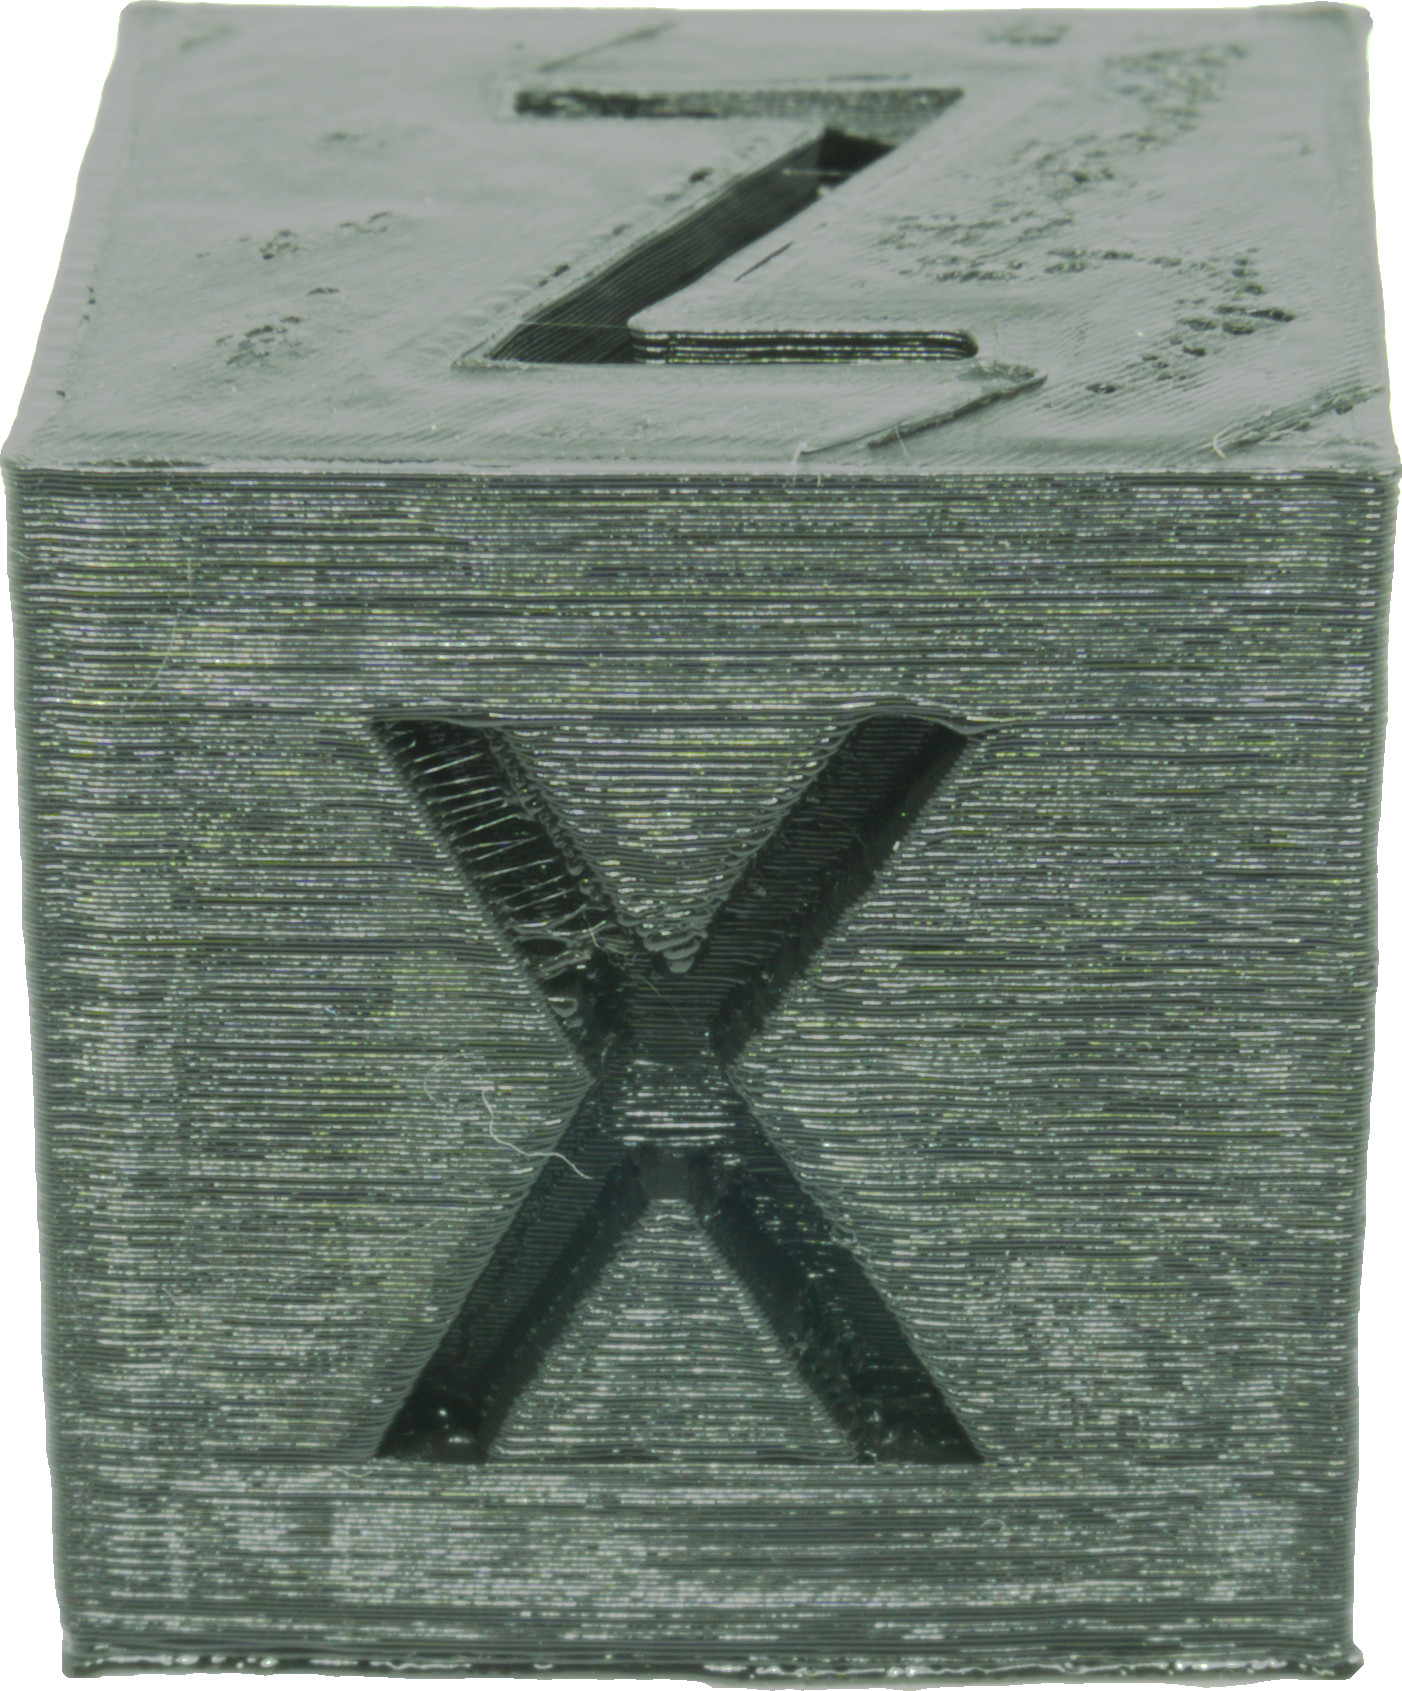
About Right
Printed at 210°C.
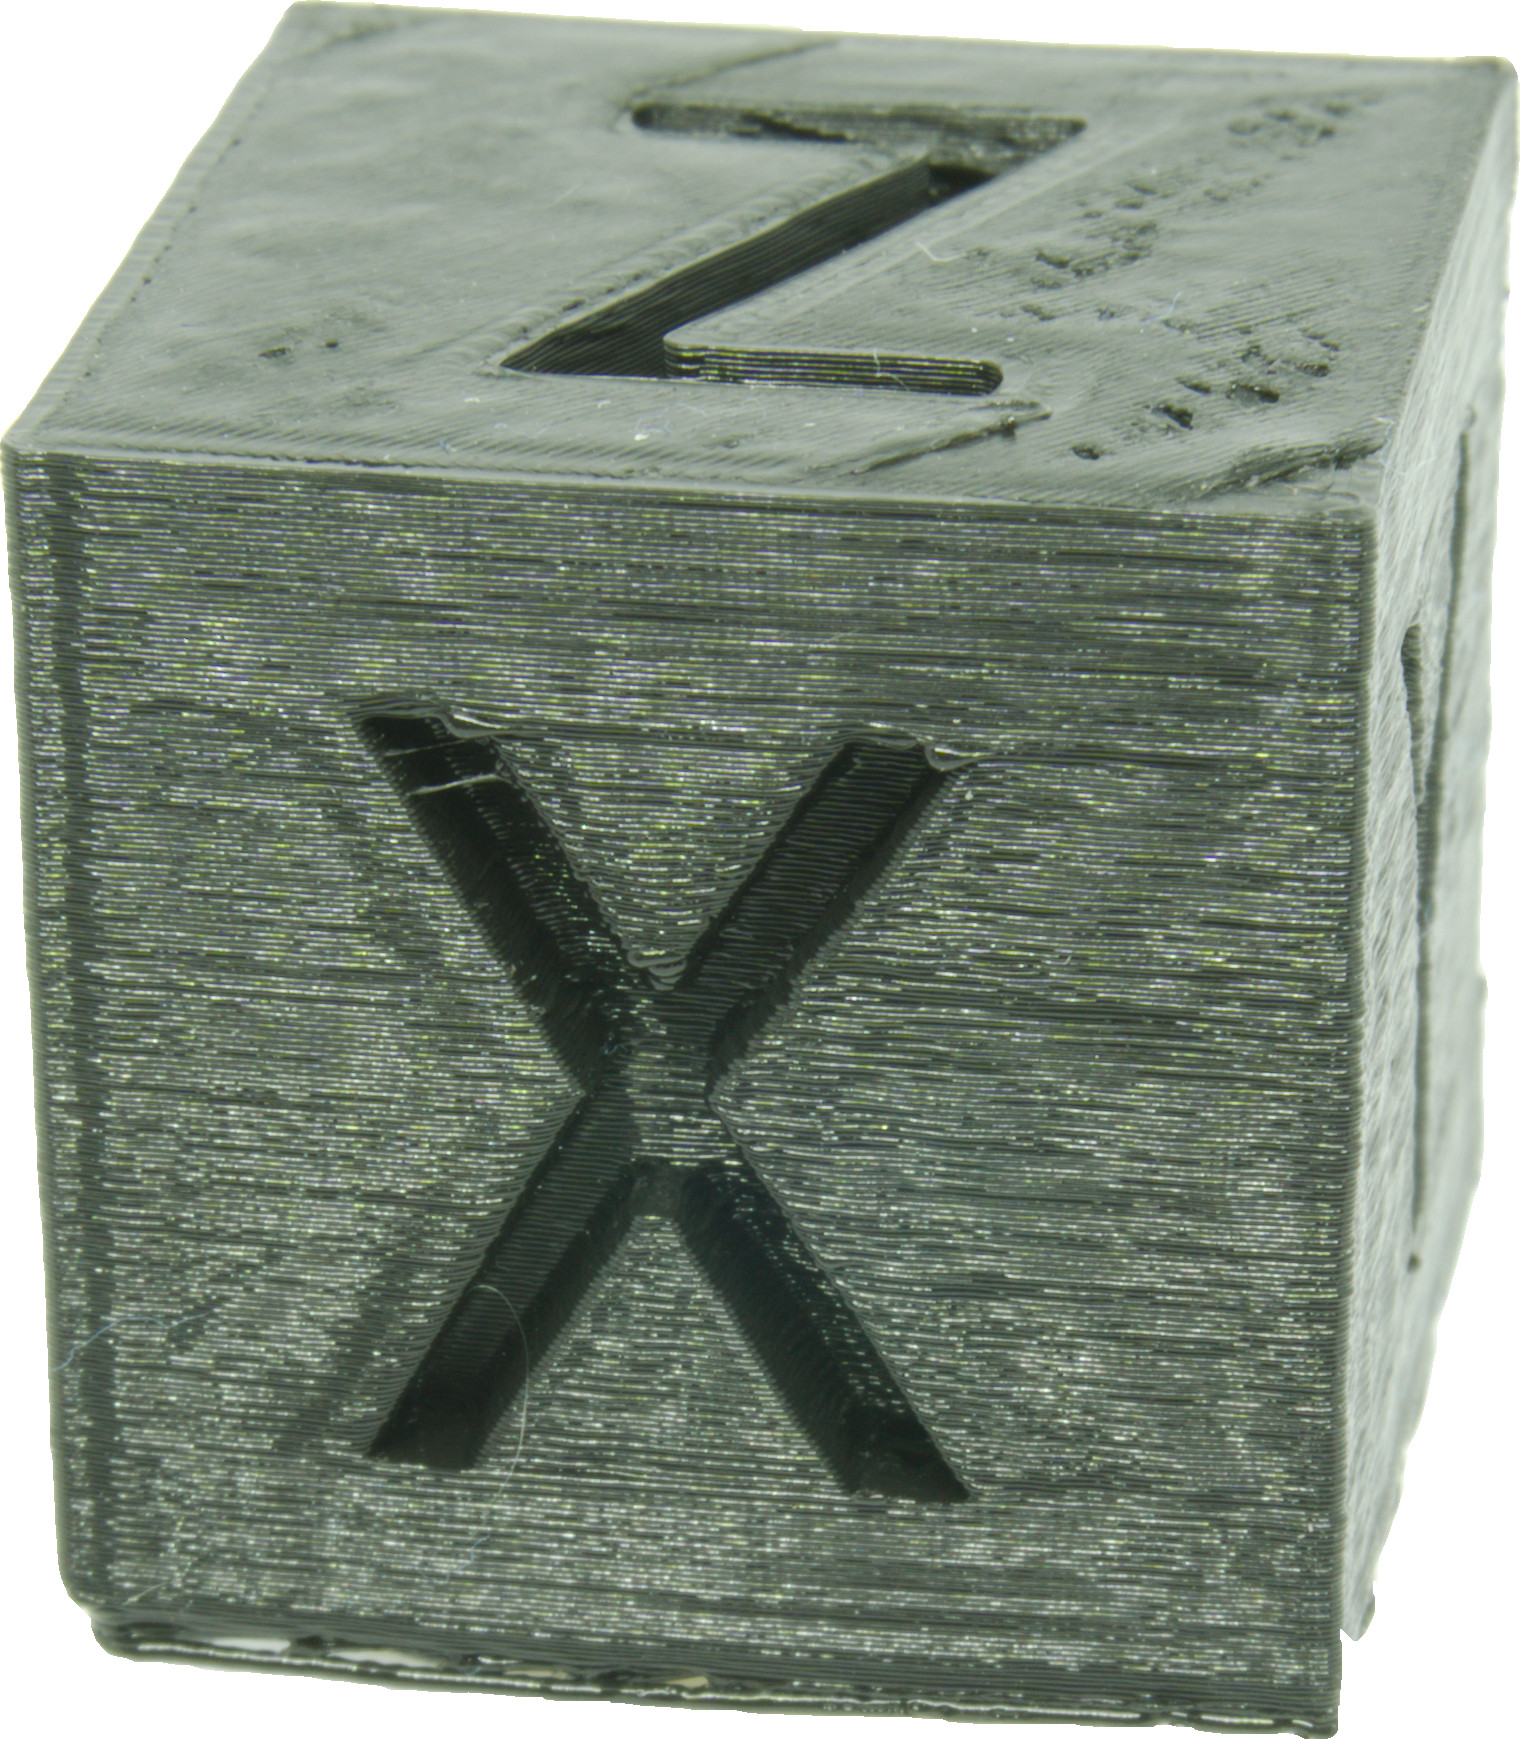
Bear in mind that temperature depends on speed. The slightly glossy surface is typical of freshly printed black PLA. You may notice a “shadow” next to the X, indicating mechanical system play, or ringing. This can be mitigated by reducing acceleration.
Conclusion
Experimentation with temperatures is crucial. Merely printing a temperature calibration tower is insufficient, as the necessary temperature heavily depends on the speed and geometry of the print.
Update
I’ve achieved printing at 180 °C.
A cube printed at 180 °C, with entirely different settings. A single 0.4 mm wall allows visibility of the cubic infill. Layer height is also at 0.2 mm.
Below, you can more clearly see the results:
- Underextrusion is evident from the wavy lines in the bottom triangle.
- Severe underextrusion is also apparent in the top few millimeters, even resulting in a hole at the top. This occurs because any tiny gap prevents the subsequent layer from adhering properly, causing the hole to “grow” upwards.
- The rough surface on the right side resembles a surface that has been stretched and contracted again.